


Learning How to Read a Vectorscope
A vectorscope is a tool that is commonly included in various types of software to support filmmakers and editors in improving color quality of the video images they create. Commonly used in post-production color grading, those who are not active in this particular area of filmmaking will probably have never seen a vectorscope. Learning how to read a vectorscope isn’t exactly easy, but if you compare it to a color wheel, you’ll quickly find a level of familiarity that can make the process a bit easier.
Reading Vectorscopes
If you’ve never had the opportunity to learn about a vectorscope and how to read a vectorscope, this may seem a bit intimidating at first, but it’s not all that bad!
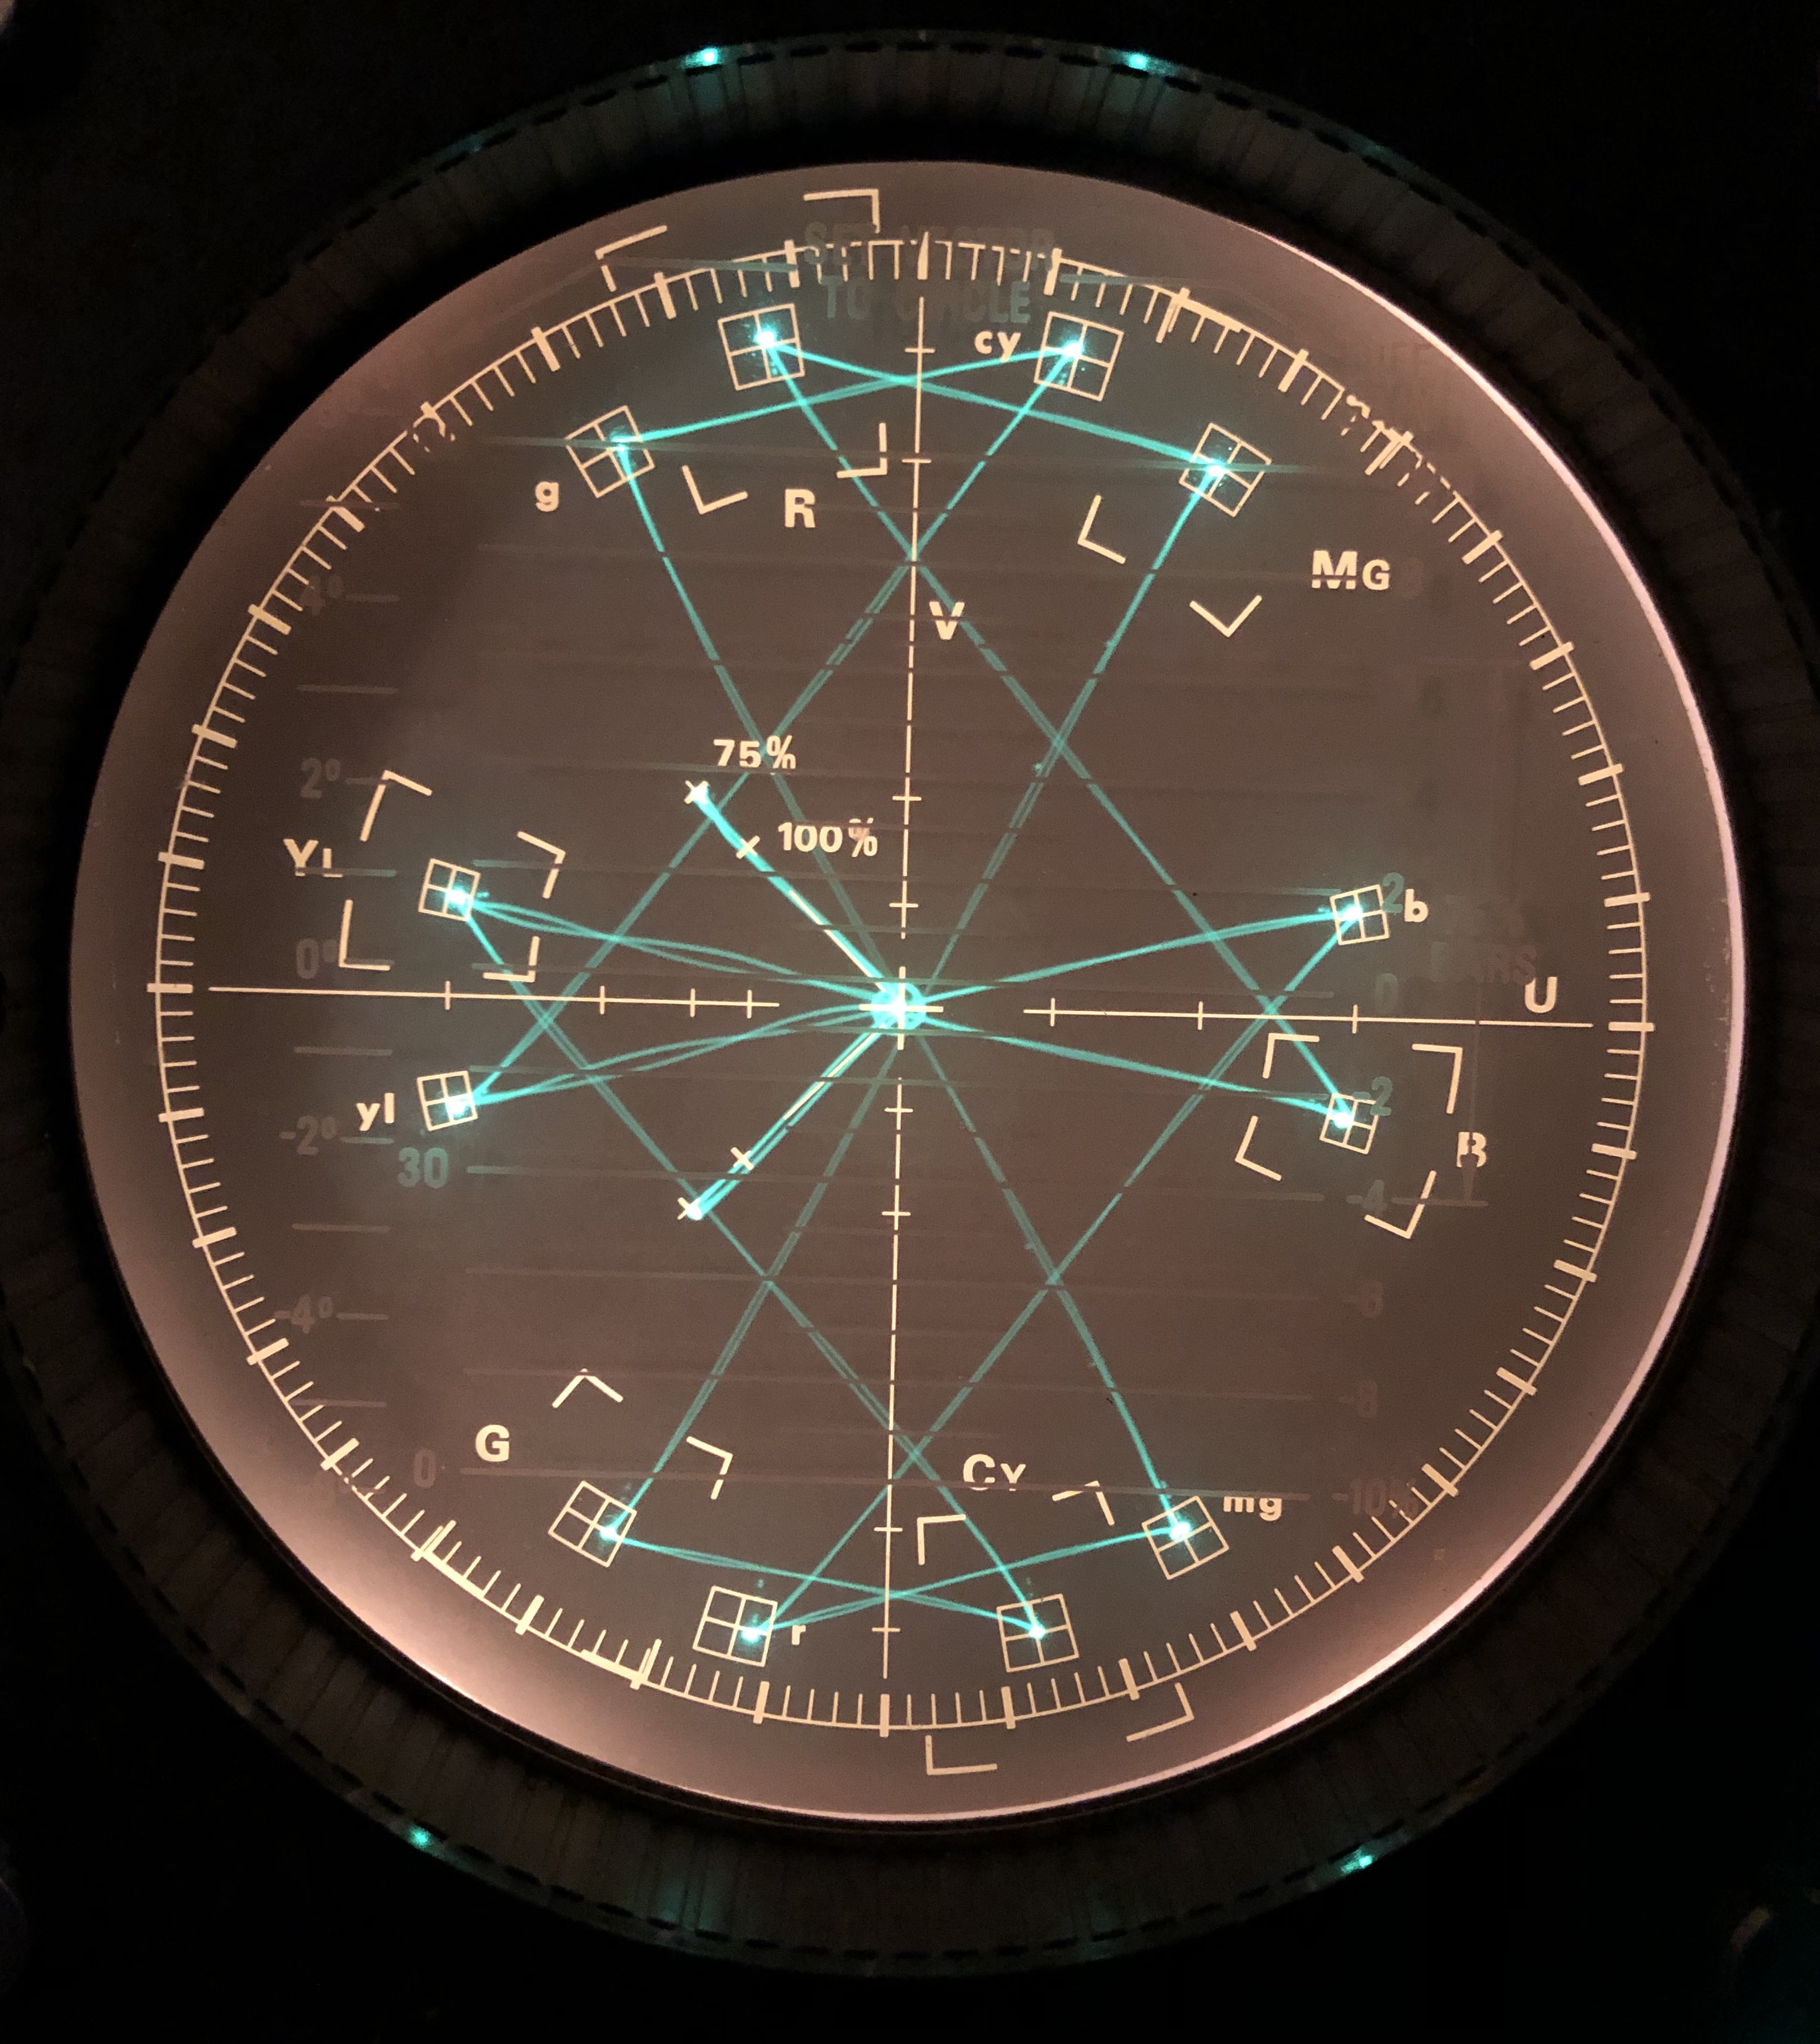
First, it’s important to recognize that a vectorscope is labeled to provide details on two important color concepts relative to your video image: hue and saturation. The angle that is present around the center of the vectorscope represents the hue. Hue is shown in terms of a 360° circle starting red and circling around through the various colors back to red.
Similar to a color wheel
Similarly, a vectorscope displays all of the colors in the same location that the color wheel would, with red at the top left and cyan located at the bottom right.
In Adobe Premiere Pro, whenever a dot or a line is seen on the vectorscope it represents unique data or information, known as the chroma or “Chrominance” of the shot, which is dictated by color or hue, and saturation or strength of the color.
A line starting at the center of the vectorscope and pushing out towards the outer edge of the circle represents the total color saturation. A short line denotes a less saturated color, a long line equals a more saturated color.
Learning how to Read a Vectorscope for Broadcast
Color grading video that will be broadcasted on national television has some additional requirements to ensure the video footage is not rejected by broadcast quality control, and to make sure that your audience (all of them) can see the colors appropriately.
Vectorscopes, such as the one in Adobe Premiere Pro, have a lot of different features to assist you with this. In fact, within Adobe’s vectorscope, you’ll find points that are linked to drop-down menus which will assist you in checking your colors to ensure they all within appropriate broadcast approved “Safe” colors.
These colors are generally represented by a 75% saturation limit, meaning that you really should never go beyond that target of saturation for a particular number. Using your vectorscope to measure color saturation of your image, always make sure that your colors stay within the guidelines so that you don’t miss an opportunity to distribute your content via television broadcast.
Learning How to Read a Vectorscope Skin Tone Line
One of the most commonly used features of the Premiere Pro vectorscope is the “Skin Tone Line.” Color graders and editors use this tool to help them to correct skin tones, ensure accuracy of skin color throughout, and employ continuity in skin tone across the entire video footage.
Achieving appropriate skin tone color with the vectorscope typically requires the use of an additional tool in Premiere Pro called the garbage matte. The artist first uses the garbage matte effect to cover the skin of the person in the shot, and then employs the vectorscope in order to compare the image to the skin tone line in the vectorscope.
To adjust, “Fast Color Corrector” can be used to then bring the line in balance with the “hue angle” so that all skin tones in the image are representative of true skin color.
As you can see, learning how to read the vectorscope is something that will take some time, commitment, and a lot of practice, but as you continue to work with the tools you’ll find yourself better equipped to employ proper color correction throughout your films.